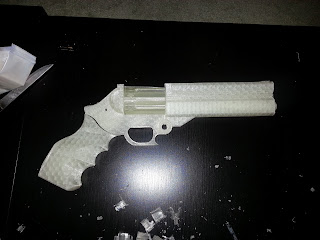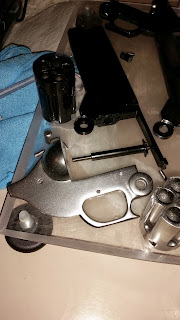
As my first commission, I was asked to make two copies of this model from thingiverse:
http://www.thingiverse.com/thing:251565
The model is of Vash the Stampede's pistol from Trigun. I've used this project as a learning experience and have tried out many different techniques during its production.
I started by printing out pieces the original model, to get an idea of the sizing. It ended up being a bit too big, and parts of it differed too much from the source material. I used Netfabb to slice the front barell into top bottom and middle pieces. I squared out the top portion to better match the source design. Parts were glued together using E6000 craft adhesive.

I was using primer as the sole filler at this time. It works fairly well for the vertical striations of a 3d printed piece, but it does not do well for deeper crevices. You would need too much primer, and its too soft in heavier coats.


Its a little hard to see in these photos, but as well as squaring out the top, I made a set of screws to fit in the top. Instead of reprinting the barrel with the screws in it, I made a template to drill holes into the barrel. E6000 was used again to glue the screws in place. Photos here are shown after a fairly disastrous first coat. I was using Alclad II model paints, which look amazing, but are very finicky. You can still see the black undercoat I used in these photos. I used Alclad black primer here instead of gloss black. It's much thicker and less glossy, which is bad for the top coat.


Shown here is a proper application of Alclad II paints. The better the gloss undercoat, the better the chrome and black chrome looks.


The finished guns laid out. Unfortunately for me, I was uneducated in the ways of sealant at this time. Alclad paints have their own gloss sealant, but it really doesn't do much to prevent wear and tear. After a little use, the paint starts to chip, even if heavily sealed. I would need to start over again. The handles are done in plasti-dip, which fills in the striations and also gives a grippy plastic feel.


My next thought was to use a better, thicker sealant. This is also when I learned about different paint chemicals and their interactions. Here is the piece with the same paint as above, but with a coating of enamel sealant. It speckled and cracked, which gives a nice look in moderation, but it was still fragile. The same thing happened when I used lacquer sealant, so it seemed like Alclad paints are not going to work for props that are meant to be carried around. It's fine for display pieces though.

On to new paints then. I tried both Rustoleum flat aluminum and chrome. I couldn't seem to get the chrome to get a good, clean coat. I got a little smarter this time and used smooth on XTC-3d as a filler. I had to first use acetone to strip all the old primer off and start fresh. This version was done with just flat aluminum paint.


The client asked me to ensure a durable paint job. To do this, I had to get a little clever. I ended up not using paint at all. The effect here is a faux cold cast. A cold cast is a resin cast with metal powder on the surface or throughout. Not wanting to take the time and money to do a full cast, I tried a new technique. I covered the parts in XTC-3d epoxy resin filler and then covered that in aluminum powder while is was curing. The powder is thick, so the coating can be sanded or scraped with steel wool. I used black shoe polish to highlight the texture and add a weathering effect. The result is a very durable effect that scratches and shines like solid aluminum. Unfortunately, I filled over the screws in the process, but I really like how it turned out. It's also a quick technique for one off props.


And here we have the finished product. Two different versions of the same pistol. Only the cold cast version still has the working joints. With the finishing work, it was difficult to get the joints to move, but not be too loose.

